How to Install Interlocking Pavers: Step-by-Step Guide
Interlocking Admin / October 9, 2025

Planning Your Project
Assessing Your Space
Before diving into the interlocking pavers installation, assess the area where you plan to lay the pavers. Measure the dimensions to determine how many pavers you will need. Consider the layout—straight lines tend to be easier for beginners, while curves can add an elegant touch but require more planning. Project planning is vital.
Choosing the Right Pavers
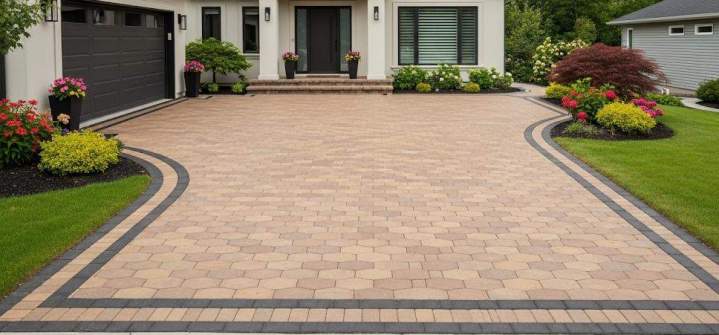
Interlocking pavers come in various materials, colors, and sizes. Concrete pavers are a popular choice due to their durability and range of styles. However, natural stone options like granite or slate can provide a unique aesthetic. Select pavers that complement your home and landscaping.
Preparing the Ground
Clearing the Area
Begin by clearing the designated area of grass, weeds, and debris. Remove any existing materials like old pavement or stones that might interfere with the leveling process. You may need to rent a sod cutter for larger projects to ensure a clean slate.
Excavating the Soil
Next, excavate the soil to a depth of about 6-8 inches below the desired finished height of your paver surface. This depth will accommodate the base materials and the pavers themselves. Make sure to slope the area slightly away from structures to facilitate proper drainage.
Compacting the Soil
After excavation, use a plate compactor to compact the soil. This step is crucial for preventing settling. If the soil is particularly loose or sandy, consider adding a geotextile fabric to stabilize the ground further.
Installing the Base
Adding a Gravel Base
Once the soil is compacted, add a layer of crushed stone or gravel, approximately 4-6 inches thick. This base layer is vital for drainage and provides a stable foundation for the pavers. Use a rake to spread the gravel evenly and compact it thoroughly.
Installing Edge Restraints
Edge restraints, such as plastic or metal edging, help keep the pavers in place and prevent spreading over time. Install these restraints along the perimeter of your project area, ensuring they are level and securely anchored in the ground.
Leveling the Base
To ensure a flat surface, add a layer of sand (1 inch thick) over the gravel. Use a screed board to level the sand, creating a smooth surface. This layer will allow for slight adjustments when setting the pavers.
Laying the Pavers
Starting the Pattern
Begin laying the pavers from a corner or edge, following the desired pattern. It’s advisable to start with a straight line for easier alignment. As you lay each paver, leave a small gap (about 1/8 inch) between them for sand filling, which will help lock them in place later.
Cutting Pavers
You may encounter areas where full pavers do not fit. Use a wet saw or a hammer and chisel to cut pavers as necessary. Always wear safety goggles when cutting to protect your eyes from flying debris.
Filling Gaps
Once all pavers are laid, sweep fine sand across the surface and into the gaps between the pavers. This step locks the pavers in place and reduces movement. For additional stability, you can lightly mist the surface with water to help the sand settle. Joint sand is key.
Final Touches
Compacting the Pavers
After filling the gaps, use a plate compactor again to gently compact the newly laid pavers. This action will help settle the sand into the joints and ensure everything is secure. Be cautious not to damage the pavers during this process. Paver compaction is crucial.
Sealing the Pavers
While sealing is optional, it can greatly enhance the longevity and appearance of your pavers. A sealant can protect against stains, fading, and erosion. Apply the sealant according to the manufacturer's instructions, typically after allowing a few days for the sand to settle. Paver sealing adds protection.
Maintenance Tips
To keep your interlocking pavers looking their best, regular maintenance is key. Sweep away debris and clean with a mild detergent to prevent stains. If any pavers become loose, simply lift and re-level them with more sand. For weeds, a natural herbicide can help keep your paver area looking pristine.
By following these steps, you not only enhance your outdoor space but also gain a sense of accomplishment. For best results, consider calling a professional to guide you through the process.

